Complete this task to generate a statement before the regularly scheduled statement cycle.
You can define what information is included in the demand statement. The demand statement is printed for the individual account and can include either the current activity for open balances only or historical activity for all balances.
Step-By-Step Guide
Step | Instructions | Additional Information | ||||
|---|---|---|---|---|---|---|
| 1 | From the Act: [ID] > General tab, verify the Send option is selected. If not, select Send.
|
| ||||
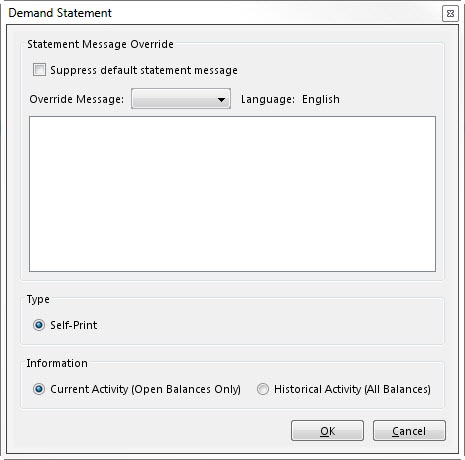
| 2 | Click Demand Statement. The Demand Statement window opens.
| |||||
| 3 | (Optional) Update the statement message via the following actions:
|
| ||||
| 4 | Update the Type selection to define how to print the demand statement: Self-Print or Statement Service. |
| ||||
| 5 | Update the Information option to determine the information to include in the demand statement: Current Activity (Open Balances Only) or Historical Activity (All Balances). | |||||
| 6 | Click OK. The statement appears in the default preview window. | |||||
| 7 | Print the statement from the preview window. |
| Panel | ||||||||
|---|---|---|---|---|---|---|---|---|
| ||||||||
Not applicable for this topic |
Search this documentation
| Livesearch | ||
|---|---|---|
|