Overview
The EDC Files tab includes EDC files imported into Connect Back Office via the EDC File Import process or Connect Mobile Assistant. EDC Interface Configurations are either set to auto-create charge batches based on certain criteria (e.g., Date of Service, Facility, Facility & Date of Service, All in One) or set to Do not auto create Charge Batch(es). This table allows the user to create charge batches and include only selected, non-processed files (files not in an auto-created charge batch).

Field Definitions
Field | Type | Required | Description |
|---|---|---|---|
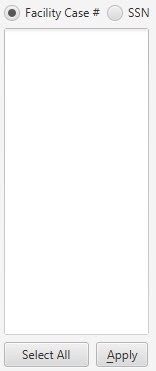
| Filter Within Search Results Section | Filters | No | Allows the list of EDC files to be filtered by Facility Case ID, SSN, Patient, and/or Guarantor. As you type, the EDC files in the list are filtered to show only those that match what was typed. To restore the list to all files, clear the contents of the filters. |
| Facility Case ID | Display Only (pulled from EDC File) | Yes | The unique identification number assigned to the case at the facility. The first character of this identification number is the source ID given to the facility in the EDC interface configuration. This source ID uniquely identifies the case by facility. By default, the table is sorted by the Facility Case ID column. |
| Practice | Display Only (pulled from EDC File) | Yes | The practice associated with the EDC file. |
| Facility | Display Only (pulled from EDC File) | Yes | The name of the facility where the patient was treated. |
| Patient | Display Only (pulled from EDC File) | Yes | The name of the patient (last name, first name, middle initial). |
| SSN | Display Only (pulled from EDC File) | Yes | The Social Security Number of the patient. The SSN field is masked, displaying only the last four digits. If your role has been given permissions to unmask and view SSNs in this table, the lock icon |
| DOB | Display Only (pulled from EDC File) | Yes | The birth date of the patient. |
| Admit Date | Display Only (pulled from EDC File) | Yes | The date the patient was admitted to the hospital. |
| Primary Insurance | Display Only (pulled from EDC File) | No | The name of the patient's primary insurance. |
| Member # | Display Only (pulled from EDC File) | No | The unique identification number of the member. This number is issued by the payer. |
| Group # | Display Only (pulled from EDC File) | No | The unique identification number of the group. This number is issued by the payer. |
| Guarantor | Display Only (pulled from EDC File) | No | The name of the guarantor on the patient account. |
| DOS | Display Only (pulled from EDC File) | No | The Date of Service of the primary procedure on the case. |
| Created Date | Read-only (system generated when the EDC File is created) | Yes | The date the EDC file was created. |
| File | Display Only (pulled from EDC File) | Yes | The source file name of the EDC file. |
Button Descriptions
Button | Shortcut Keys | Description | Step-By-Step Guides |
|---|---|---|---|
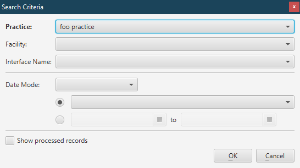
| Search | [Alt] + [S] | To search for EDC files. |
|
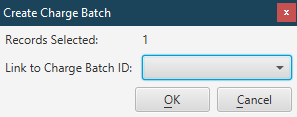
| Create Charge Batch | [Alt] + [R] | To confirm the number of cases to be included in the new charge batch. |
|
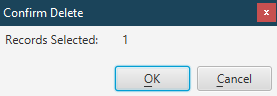
| Delete | [Alt] + [D] | To delete the selected EDC file from the table. |
|
| Select All/Select None | Not applicable | To select or de-select all records in the EDC Files table. |
|
| Apply | [Alt] + [A] | To apply search criteria and select matching records |
|