Complete this task to add service line distributions for a guarantor payment. This task is a continuation of the Applying Guarantor Payments task and begins at the Add Distribution window. 

Step-By-Step Guide

Step

Instructions

Additional Information

1

From the Add Distribution window of a guarantor payment, search or enter the Account number to which you are applying the service line distribution.


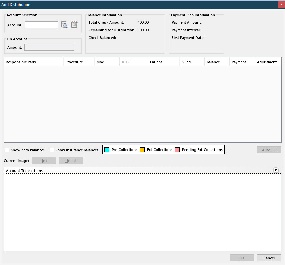
The service lines on the account are listed in the table. Service lines that have been moved to pre-collections, external collections, or pending eternal collections are color-coded according to the key:


Finding Accounts

  1. Click for the Account. The Search Criteria window opens.
  2. Do one of the following:
    • To find all accounts, click OK.

    • To find accounts by one or more of the following filter options, enter the search criteria, and then click OK:

      • Account ID

      • Date of Service

      • Check Number

      • Claim ID

      • Pre-Collection Account ID

      • Case ID

      • Facility Case ID

      • External Case ID

    • To search by Practice, open the drop down list and select the practice associated with the account.

    • To filter search results by account flags, select the checkboxes of any of the following options:
      • Hold Statements
      • Suspend Pre-Collection
      • Returned Mail
      • Suspense Guarantor Collections
      • Suspense Insurance Collections
    • To find specific accounts by guarantor, specify one or more of the following filter options, then click OK:
      • Type
      • Guarantor
      • DOB
      • SSN/EIN
      • Phone
    • To find specific accounts by patient, specify one or more of the following filter options, then click OK:
      • Patient
      • DOB
      • SSN
  3. When the search is completed, the accounts matching the search criteria are listed on the Find Account window.

  4. Use one or more of the filtering controls to find a specific account in the account set:

    • Guarantor Name
    • SSN/EIN
    • Phone
  5. As you enter information in the filter, the accounts list shows only the accounts that match the filter. Clear the filter to display all accounts in the account set.
  6. Select the Show Patient Information checkbox to hide or show patient information for each guarantor account.
  7. Click the account to which you are applying the service line distribution or on-account line item, then click OK. The account number of the account you selected appears in the Account field.

2

(Optional) Review the Account Transactions section (Active AR Grid) at the bottom of the page for the selected Account.

Click the to expand or collapse the AR Grid display at the bottom of the page.


3

Do one of the following:

  • Click Auto Fill to automatically distribute the remaining amount for distribution to all service lines. Monies are distributed to the first service line in the list, and then to any subsequent service lines (service line by service line) until the entire remaining for distribution amount is distributed. The distribution amount appears in the Payment column of the procedure for the service line to which the distribution is being applied.
  • To manually distribute the remaining amount for distribution to each service line, enter the amount to distribute to the service line in the Payment column of the procedure. Repeat for each procedure to apply a service line distribution, if applicable.

4

Link or unlink an image to the distribution, if applicable.


5Add a service fee line adjustment, if applicable.


Click in the Adjustment field to open the Adjustment window to specify the purpose and the amount of the miscellaneous adjustment.
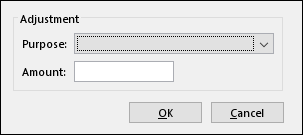
  • The Purpose identifies the type of adjustment that is being applied to the service line distribution (positive or negative). Based on the transaction code that you select, the account is adjusted accordingly and recorded in Active AR. 
  • The adjustment Amount being applied on the service line distribution. This amount will be recorded as either the MADJN (negative) or MADJP (positive) activity code in active AR based on the purpose of the adjustment.


6

When you are finished, click Save (or press Alt + S).


  • No labels