Use this task to add providers to the provider master list.
Step-By-Step Guide
| Step | Instructions | Additional Information |
|---|---|---|
| 1 | From the Providers page, click Create. The Provider: New window opens. | |
| 2 | In the Provider Name and Address section, enter the name of the provider in the Name field. | The Name field must be unique. |
| 3 | Enter of the street address for the provider in the Address line 1 and line 2 fields, if applicable. | To auto-populate the practice address when creating a new provider profile, select the Yes option for the Practice Provider field. The first box checked in the Practice Affiliations table determines which address is auto-populated in the Address field. |
| 4 | Enter the zip code for the provider in the Zip Code field. | |
| 5 | (Optional) Enter the name of the city for the provider in the City field. | The City field auto-populates based on the value entered for the Zip Code field, but can be updated, if necessary. |
| 6 | (Optional) Open the State drop down list and select the state for the provider. | The State field auto-populates based on the value entered for the Zip Code field, but can be updated, if necessary. |
| 7 | In the Phone and Email Contacts section, enter the relevant numbers and extensions, if applicable:
| |
| 8 | (Optional) Enter the email address of the provider in the Email field. | |
| 9 | In the Provider Type section, open the Specialty field drop down list and select the specialty of the provider. | If you begin typing either the taxonomy code or specialty name in the field, the list will filter to include the input data. |
| 10 | Open the Billing Type field and select the professional designation that most describes how services for the provider will be billed. | |
| 11 | At the Practice Provider field, indicate whether the provider is affiliated with practices. | |
| 12 | At the Can Refer field, indicate whether the physician can refer patients to other providers. | |
| 13 | Open the Medicare Assignment Code field and select the appropriate value to indicate whether Medicare sends reimbursement to the provider or the patient. | |
| 14 | (Optional) Select the Send zipcode in claims option, if applicable. | |
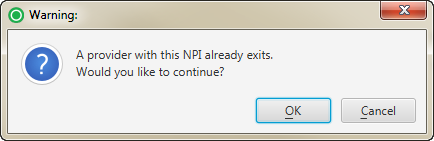
| 15 | In the Identification Numbers section, record the relevant identification numbers:
| If you try to save the new provider with a NPI Number that exists for a provider already in the database, you will receive a warning message to confirm. Click OK to create the provider with the duplicate NPI Number or click Cancel to return to the page and make changes.
It is required for either the NPI Number or Social Security Number to be populated. |
| 16 | In the Practice Affiliations table, select all practices with which the provider is affiliated. | To select/deselect all practices listed, click the Select All/Select None button. If the provider is affiliated to a practice that is not listed, create the practice via the Practices page. |
| 17 | In the Facility Affiliations table, select all facilities with which the provider is affiliated. | To select/deselect all facilities listed, click the Select All/Select None button. If the provider is affiliated to a facility that is not listed, create the facility via the Facilities page. |
| 18 | Click Apply. | |
| 19 | Click Save to save and close the page. |
Not applicable for this topic