Step | Instructions | |
|---|
| 1 | From the EDC Interface Configurations page, click Create. The EDC Interface Configuration: New page opens. | |
| 2 | In the General section, enter the name being given to the EDC interface configuration. | |
| 3 | Open the Interface drop down list and select the hospital or facility that is sending the EDC file. | |
| 4 | Open the Practice drop down list and select the practice associated with the EDC interface configuration | |
| 5 | (Optional) To copy the member number to the subscriber number, check the Copy Member Number to Subscriber Number option. | |
| 6 | In the Batch Cases by section, select the applicable option. This determines if charge batches are auto-created and what cases are included in each charge batch. | |
| 7 | If the EDC file: - Does not include facilities, select a default facility by opening the Facility drop down list and selecting an option.
- Includes facilities, configure the facility with the general information in the Facility Mapping section:
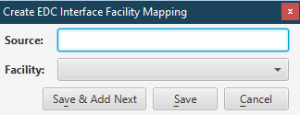
- Click Create. The Create Interface Facility Mapping window opens.
 - Type the name or code that identifies the facility from the EDC file in the Source field.
- Open the Facility drop down list and select a facility.
- Click Save or Save & Add Next to repeat the above steps until all facilities are mapped to the practice.
| |
| 8 | Open the Mapping Element drop down list and select the element to map. | |
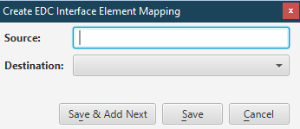
| 9 | To map an element in the Element Mapping section: - Click Create. The Create Interface Element Mapping window opens.
 - Type the name or code that identifies the element to map in the Source field.
- Open the Destination drop down list and select the element to be mapped to the source element.
- Click Save or Save & Add Next to repeat the above steps until all elements are mapped for the practice.
| |
| 10 | Click Apply. | |
| 11 | Click Save to save and close the page. | |