Overview
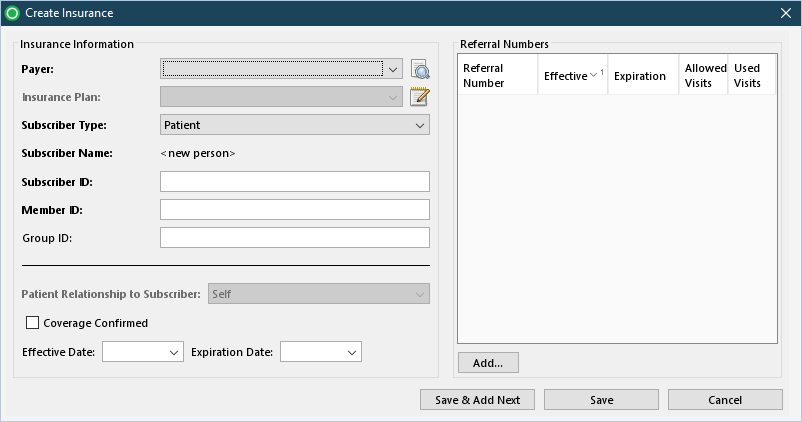
The Create Insurance window is used to record insurance information for the account/person.
Field Definitions
Field | Type | Required | Description |
|---|---|---|---|
| Payer | Drop Down | Yes | The company that provides insurance coverage for the patient. Payers can be insurance companies or a government agency, for example, Medicare or Medicaid. The list of payers is maintained in Admin > Payers & Plans. |
| Insurance Plan | Drop Down | Yes | The name of the plan that provides the insurance coverage for the patient. Plans belong to payers, which are insurance companies or government agencies, for example, Medicare or Medicaid. The list of plans is maintained in Admin > Payers & Plans. If the plan selected has been designated as a Miscellaneous Plan - Always ask for updated plan name and address (via Plan page > Claims tab), the Plan Address window opens after tabbing out of the Plan field. 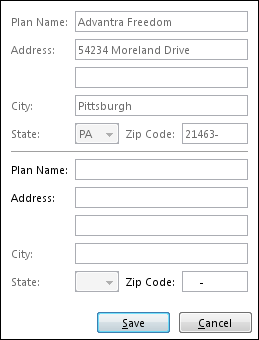 You must enter a name and address for the plan before any new information entered can be saved. |
| Subscriber Type | Drop Down | Yes | The person who is insured. The available options include:
If you select Some Other Person or Organization, the Subscriber Name option becomes available. You must specify the name of the person or company who has financial responsibility for the patient. |
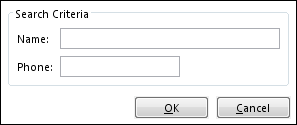
| Subscriber Name | Drop Down | Yes | The person or organization who is financially responsible for the patient. If the person or organization is not listed, use the search criteria (as shown) to find the person or organization.
For a person search, you can enter last name, first name, social security number, date of birth, or account number as the search criteria. Only the names that match the search criteria will be listed on the Select a Person window that opens with search results. For an organization search, you can enter a partial name by typing one or more letters of the last name or first name. The search will be done on the information entered. Press [Tab] to advance to each option.
You can enter name or phone as the search criteria. Only the records that match the search criteria will be listed on the Find Organization window that opens with search results. |
| Subscriber ID | Free Text | Yes | The person who owns the insurance coverage. The unique number issued by the payer to the employee who participates in a group plan. This number identifies the employee and can be the same as the Member ID, based on whether the insurance company issues separate numbers to identify its participants. |
| Member ID | Free Text | Yes | The unique number issues by the payer to identify the patient who participates in a group plan. Member IDs and Subscriber IDs can be the same or a different number based on whether the insurance company issues separate number to identify its participants. The member identification number is used by some payers to differentiate between the employee and the participating dependents, for example 00 might identify the employee and 01 might identify the spouse of the employee. |
| Group ID | Free Text | No | The unique number issued by the payer to the owner of the insurance policy. |
| Patient Relationship to Subscriber | Drop Down | Yes | The relationship to the participating subscriber of the insurance plan. The drop down list becomes available only when the Subscriber Type is set to Some Other Person. Click the appropriate value from the list:
|
| Coverage Confirmed | Checkbox | No | If selected, the insurance coverage has been verified as current and valid. |
| Effective Date | Calendar Date | No | Date field used to designate the insurance effective date. |
| Expiration Date | Calendar Date | No | Date field used to designate the insurance expiration date. |
| Referral Numbers | Table | No | The table is used to add and track referral numbers:
|

Button/Icon Descriptions
Button | Shortcut | Description | Step by Step Guides |
|---|---|---|---|
| Add | [Alt] + [A] | To add a referral number to the insurance. |
|
| [CTRL] + [F] | Opens the appropriate search window to locate the relevant object (e.g., payer). |
| |
| [CTRL] + [C] | Open the appropriate create window to create the relevant object (e.g., Create Subscriber window). |
| |
| [CTRL] + [U] | Opens the appropriate edit window to modify the relevant object (e.g., insurance plan name/address, Update Person window). |
|