Complete this task to create a scheduled report execution in Portal. Reports can be scheduled for a single, specific time in the future or on a recurring basis.
Step-By-Step Guide
Instructions | Additional Information | |
|---|---|---|
| 1 | From the Reports tab in Portal, select the report you would like to schedule. | |
| 2 | Click Edit. The Criteria page for the report is displayed. | |
| 3 | Enter the relevant criteria for the report. | The Report Folder field is optional and defaults to System, but if you'd like the report placed in a specific folder location, open the drop down list and select a folder. Only folders to which you have access are displayed. |
| 4 | Click Schedule Report. The Schedule page opens.
|
|
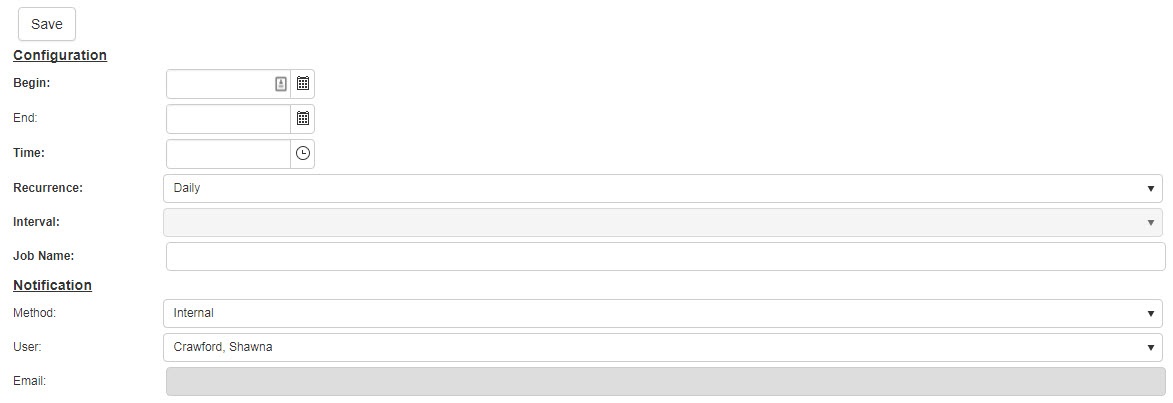
| 5 | Enter the Configuration information for the scheduled report:
| If Weekly is selected for the Recurrence, you will need to select the Day of the Week to run the report. If Monthly is selected for the Recurrence, you will need to select the Day of the Month to run the report. |
| 6 | Enter the Notification information for the scheduled report:
| If Internal is selected for the Method, you will need to select the user to receive the notification in their Messages. If Email is selected for the Method, you will need to enter the email address to receive the notification. |
| 7 | Click Save. | The scheduled job appears in the list of jobs found on the Scheduled tab. |
Not applicable for this topic