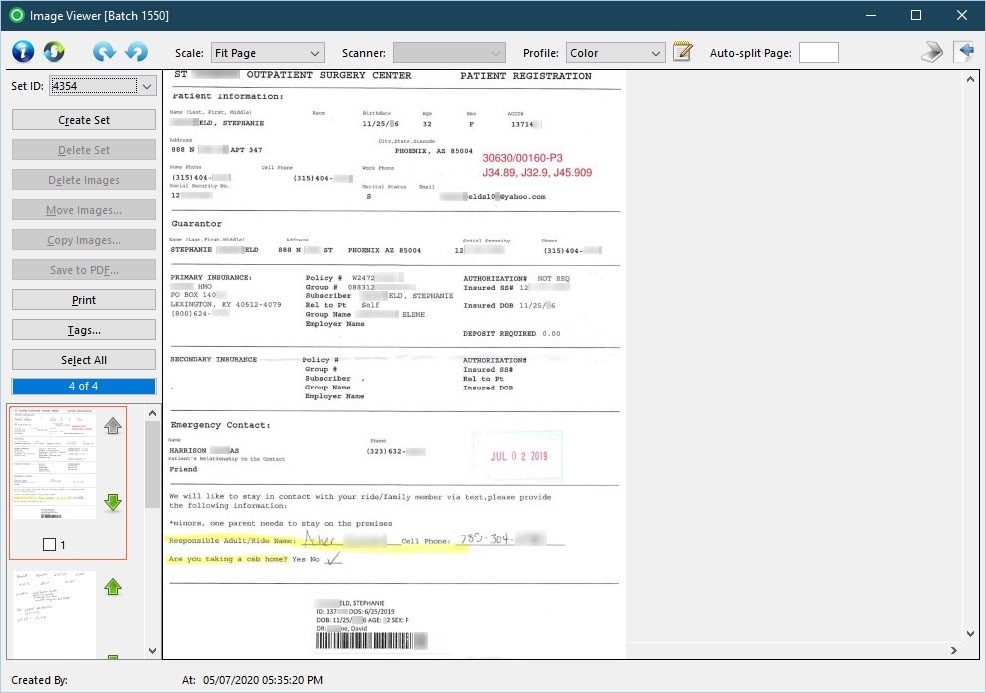
Overview
The Image Viewer page is used to:
- Add images to an image set by importing images or scanning documents while working with an image batch
Create image sets for importing images or scanning documents for attaching to a charge or payment
Preview images in an image set that is linked to a charge or payment batch or attached to a charge or payment
How to Get Here?
To open the Image Viewer page:
From the Menus: | Launch from Image: | From the Account: |
|---|---|---|
Image Viewer opens with no image set displayed. |
|
|
Field Definitions
Field | Type | Required | Description |
|---|---|---|---|
| Scale | Drop Down | Yes | The settings for magnifying the image or for adjusting the page magnification. By default, this option is set to Fit Page, indicating the image will be sized to the width and height of the page boundaries in the preview pane. To change the page magnification of the preview pane, click Fit Width to expand the image to the entire width of the preview pane. To magnify the image that is displayed in the preview pane, select a percentage from the list. You can magnify the image to 200% or reduce the image to 10%. If you use the IntelliMouse® mouse, you can use the wheel to change the magnification. To change the magnification using the IntelliMouse wheel, press and hold [Ctrl] while rotating the IntelliMouse wheel to the desired magnification. |
| Scanner | Drop Down | No | The list of scanners connected to your computer. By default, this option is set to the designated primary scanner. To select a different scanner, click one from the list. |
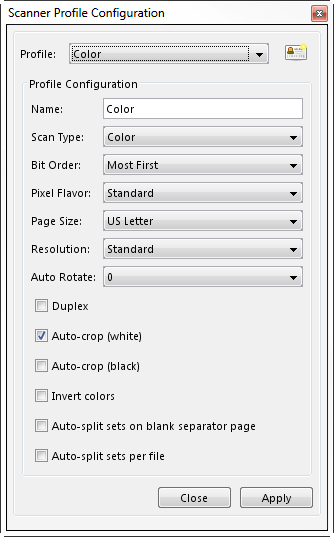
| Profile | Drop Down | Yes | Specifies the profile configuration used for your particular scanner. The profile configuration includes the settings for the TWAIN driver for a particular scanner. For example, Image Viewer requires a scanner that is TWAIN compatible. The Xerox® DocuMate 262 scanner is recommended, but not required. If your scanner is something other than the Xerox® DocuMate 262 scanner, you will need to create a profile for that scanner to make it compatible with the TWAIN driver. By default, this option is set to Color. To modify a profile, click
|
| Auto-split Page | Free Text (Numeric) | No | Creates a new image set when scanning a high volume of documents. For example, suppose you have 20 documents to scan but not all of them belong to the same image set. You can sort the documents into sets and specify the break in the Auto Split option, for example, 5. A new image set is created after the fifth document is scanned, resulting in four image sets that contain five images. To create new image sets automatically based on a specified number, enter the value in the space provided. Make sure that your documents are sorted into the sets. |
| Set ID | Drop Down | Yes | The unique identification number assigned to the set when it is created. Each set has a unique identification number and contains only the images for a particular charge or payment. To view the images in the image set, use the shortcut keys: [Alt]+[Page Up] or [Alt]+[Page Down]. |
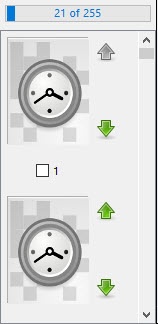
| Image Counter Progress | Read-only Display | Yes | A visual representation of the progress of the images being loaded to the page.
|
Button Descriptions
Button | Shortcut Keys | Description | Step-By-Step Guides |
|---|---|---|---|
| Create Set | [Alt] + [R] | Creates a set into which documents are scanned or images are imported. |
The newly created set can be found and accessed via the Set ID drop down list. |
| Delete Set | [Alt] + [D] | Deletes an image set. This action cannot be reversed. The Image Set must be empty before it can be deleted - first delete the images out of the set via the Delete Images button. | Deleting Image Sets |
| Delete Images | [Alt] + [E] | Deletes a selected image(s). |
Only users with the Image > Delete right have the ability to delete images. |
| Move Images | [Alt] + [M] | Moves image(s) to new or existing set in a new or existing batch. |
|
| Copy Images | [Alt] + [C] | Creates a duplicate of the selected image(s) within the current set or in a new set. |
|
| Save to PDF | [Alt] + [F] | Opens the generic Save as PDF window where you can specify where to save the image as a PDF document. |
|
| [Alt] + [P] | Allows you to print the images in an image set. Click this button after selecting the image set from the Set ID field. |
| |
| Tags | [Alt] + [T] | Freeform field to add notes for the coders, add a description about the set. |
|
| Select All / Unselect All | [Alt] + [L] | Provides a convenient way to select/unselect all images in the image set. The button toggles between values upon selection. | |
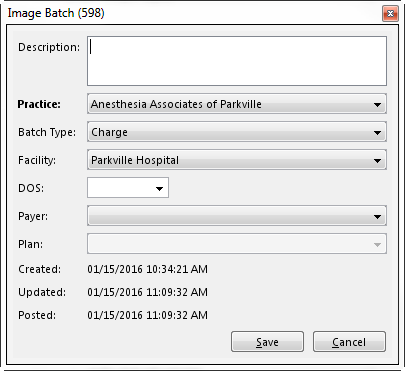
| [Alt] + [B] | Allows you to set default values for the charge or payment batches that will be created from the image batch. This button opens the Image Batch [ID] window where you can set the default values.
For charge batches, you can specify a facility or date of service. This information is used as the default values in the charge batch that is linked to the image batch. All new cases added to this charge batch will have the facility, date of service, or both that was specified in the image batch. For charge and payment batches, you can specify the description, payer, plan, or batch type as the default values for the charge or payment batch that will be created from the image batch. | ||
| [Alt] + [G] | Refreshes the Image Viewer page. | ||
[Alt] + [<]: Rotates image clockwise [Alt] + [<]: Rotates image counter-clockwise | Rotates an image's orientation by 90, 180, or 270 degree angles. Selected images rotate 90 degrees in the direction indicated each time the button is clicked. By default, this option is set to 0. | ||
| [Alt] + [S] | Starts the scanning process. Make sure the document is in the scanner before clicking this button. It is only active when there is a scanner connected to your computer. | Scanning Images | |
| [Alt] + [I] | Starts the importing process. To import an image from another source, you must click the image from the folder where it is stored. | Importing Images |