Use this task to update Action or Action Series details.
Step-By-Step Guide
Actions
Step | Instructions | Additional Information |
|---|---|---|
| 1 | From the Collections Admin / Actions & Action Series tab, select the Action to be updated and click Update (or press Alt + U). The Action & Action Series: [name] page opens. | |
| 2 | (Optional) Enter a updated name for the Action in the Action Name field. | |
| 3 | (Optional) Open the Collection Letter drop down list and select the letter associated with this action. | In most cases, Collection Letters will be used in coordination with an Action Series. The Collection Letter drop down list is a list of letters created and maintained via the Collection Letters tab. |
| 4 | (Optional) Open the Next Action drop down list and select the action to follow this action. | |
| 5 | (Optional) Enter the number of Follow-up Days after the current action to trigger the next action. | The number of follow-up days can be any number between 1-999. The Follow-up Days field is only enabled after the Next Action field is populated. |
| 6 | (Optional) Select the Inactive checkbox to mark the action as inactive. | Inactive Actions/Action Series are still included in the Connect system, but will not be available for action creation until returned to Active status. |
| 7 | Select/deselect the practice(s) that should be allowed to use the Action. | The action will only be available for collections activities for the selected practices. Click Select All to associate all practices with the action. As a result, the action will be accessible and can be used by any practice. |
| 8 | Click Apply. | |
| 9 | Click Save to save and close the page. |
Action Series
Step | Instructions | Additional Information |
|---|---|---|
| 1 | From the Collections Admin / Actions & Action Series tab, select the Action Series to be updated and click Update (or press Alt + U). The Action & Action Series: [name] page opens. | |
| 2 | (Optional) Enter a updated name for the Action Series in the Action Name field. | |
| 3 | (Optional) Select the Inactive checkbox to mark the action series as inactive. | Inactive Actions/Action Series are still included in the Connect system, but will not be available for action creation until returned to Active status. |
| 4 | Select/deselect the practice(s) that should be allowed to use the Action Series. | The action will only be available for collections activities for the selected practices. Click Select All to associate all practices with the action. As a result, the action will be accessible and can be used by any practice. |
| 5 | To add an action to the action series:
| Only actions that were created and associated to the practice are displayed in the drop down list. If the action has a name in () at the end of it, the information in the () is the collection letter attached to the action. Selecting an item with a collection letter will auto-populate the Letter field with the Collection Letter Name. |
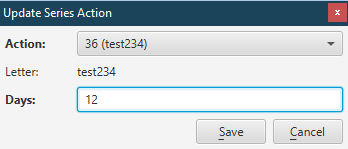
| 6 | To update an action in the action series:
| |
| 7 | To remove an action from the action series:
| |
| 8 | (Optional) Open the Final Action and select the final action of the series. |
|
| 9 | Click Apply. | |
| 10 | Click Save to save and close the page. |

Not applicable for this topic